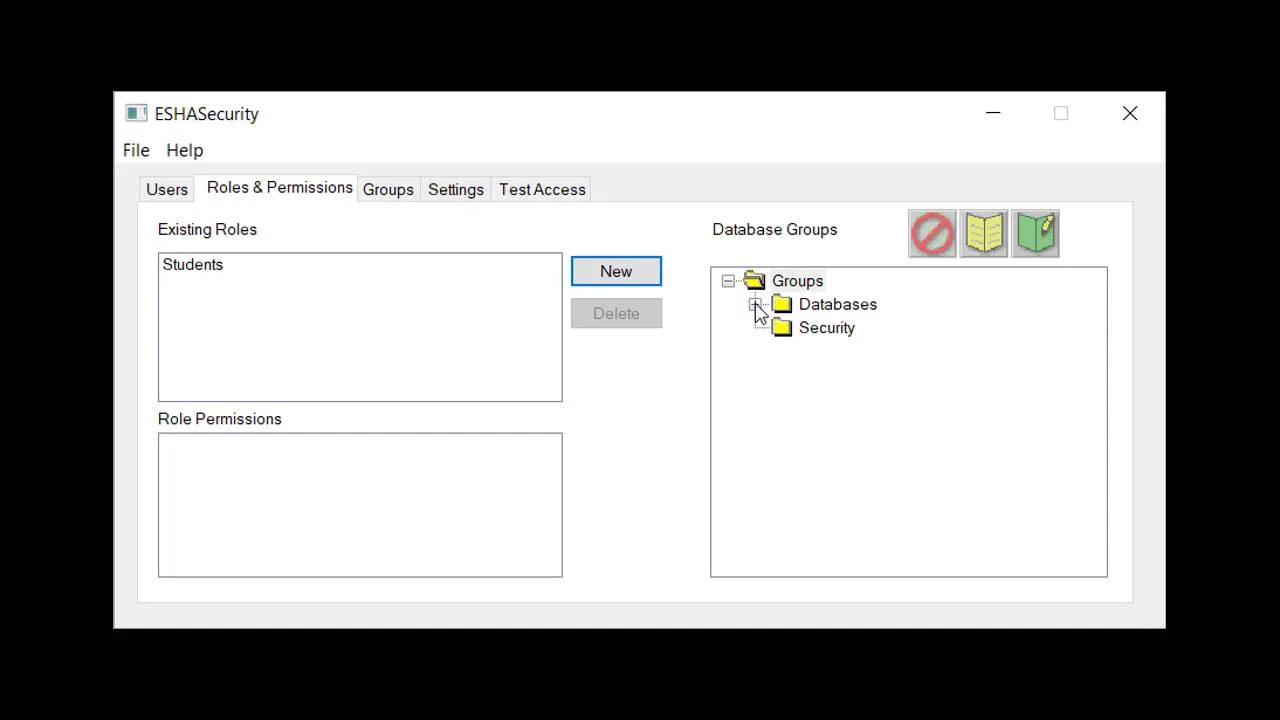
What is ESHA Security?
ESHA Security allows an administrator to establish and enforce a set of access control rules for items in the ESHA Food & Ingredient Database for your software. In simpler terms, ESHA Security secures access to your ingredients and recipes and lets the admin control who sees and edits what. (Note: ESHA Security is compatible with both Genesis R&D Foods and Food Processor.)
The basic steps are:
- Create Roles
- Define access permissions for each Role per ESHA Groups
- Assign Users to Roles
- Create Users, if necessary. Note: It’s quite likely that the Users will already exist, but instructions to “Create Users” is at the end of this blog.
Create Roles
ESHA Security uses Roles to organize access permissions. Roles are the collections of Users to which the permissions get applied.
- On the Roles and Permissions tab, click New.
- Type in the name of the Role (such as marketing, development, students, teachers, etc.).
- Click OK and the Role will appear in the Existing Roles pane.
Define Permissions
Here is where you set the access rights for each Role. All of the foods and ingredients included with the program are grouped into one of the program’s Databases, which correspond to the Databases shown in the right-hand pane below (Baby Foods, Brand Name Foods, etc.).
We recommend that you create your own Groups in the Database for user-added Recipes and Ingredients. (Check out our blog post Using Groups for Organization, Exporting, and Access Control for ideas on how you can use Groups!)
- Highlight the Role in the left pane.
- Highlight the Database (Baby Foods, Brand Name Foods, etc) in the right pane.
- Select the access rights (either No access, Read-only access, or Read-Write access).
- Repeat as necessary for all Roles.
Note: Any Database that does not have specific permissions will have the default access permissions as defined on the Settings screen.
Assign Users to Roles
- Click the User tab.
- Highlight the User
- Check the box or boxes by the Role or Roles you wish to assign to that user.
- Test access to specific foods from the Test screen by searching for a specific food. ESHA Security will tell you what group it’s in and what access the selected user has.
Groups Tab
You can, if necessary, add your own Security grouping folders from the Groups tab. After ESHA Security has been activated, the Security groups will appear in your Ingredients or Recipes within the program. You can add specific items to your Security group folder. Example: By granting all users full access to a group named, “Public Items,” any user can move an item in or out of that group freely. This allows users to share their items.
To assign a food record to a Security Group folder
- On the Groups tab, click New.
- Name your Group.
- Assign a Default Group for any new record, based on Role, if so desired.
- Open Genesis R&D or Food Processor.
- Open an existing record (Recipe, Person, Ingredient, Menu Plan, Menu Label, or Advanced Label)
- Click Edit.
- Select Groups.
- Expand the Security folder and check the Group.
IMPORTANT NOTE: Once you have everything set up, you have to activate Security. Do that from the Settings tab.
Create Users
- On the Users tab, click New.
- Choose NT Authentication (preferred) or SQL Server login. Which one you select is dependent on how the user is connected to the database. There’s more information on that here.
- Enter the user’s name and password (required for SQL server login, but not for NT Authentication).
- Click OK. The User will appear in the Current Users pane.
Setting User Access Permissions | ESHA Security

