
The Attributes feature in Genesis R&D Foods was designed to help you track specific properties in your Ingredients and Recipes in order to comply with mandatory labeling laws for bioengineered (BE) material, and/or for voluntary product claims (vegan, gluten-free, etc.). Genesis R&D comes with the BE attribute ready to use, so this blog will cover that specifically, although the same principles can be applied to user-added attributes.
Check out this blog to learn how others are using the attributes feature: Top 23 User-Created Attributes in Genesis R&D Foods.
Tracking Attributes at the Ingredient Level
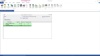
- Open an Ingredient and select the Attributes tab. You will see Bioengineered.
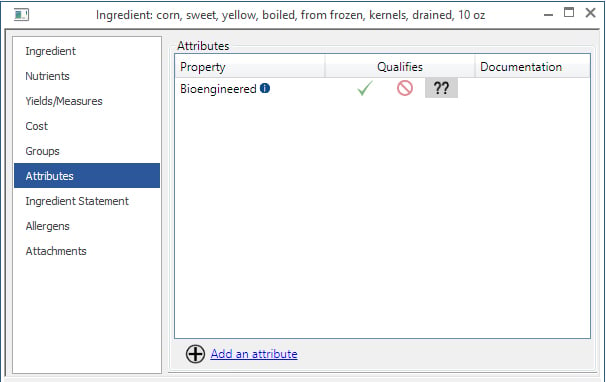
- Select one of the following under Qualifies:
• Green check = yes, this qualifies.
• Red no symbol = no, this does not qualify.
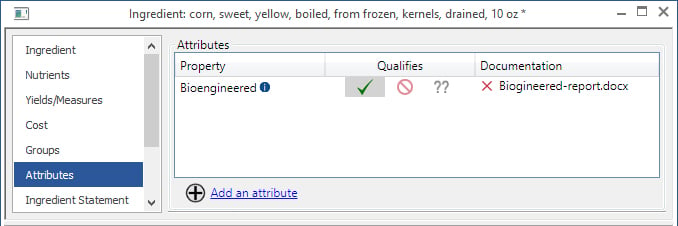
• Double question marks = unknown, not enough data. - In this example, we verified that this ingredient does have detectable bioengineered material and must be declared as BE. Select the green checkmark. Once you make a selection, the program will prompt you to add substantiating documentation.
- Click the plus sign and upload any relevant files. They will be added to both this screen and the Attachments screen. Note: when you remove documentation from this screen, it remains attached to the Ingredient until removed via the Attachments screen.
- Save and close this ingredient.
Tracking Attributes at the Recipe Level
- Open a Recipe that contains the BE ingredient.
- Go to Edit Recipe and select Attributes OR choose the Attributes button on the Ribbon.
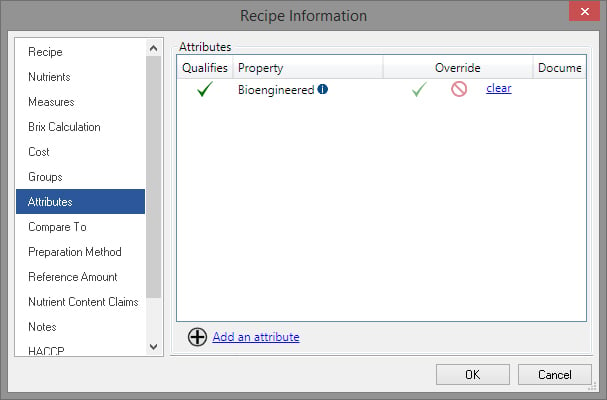
- Here you see that this Recipe qualifies for the BE property, as indicated by the green check.
- Click OK to exit this screen.
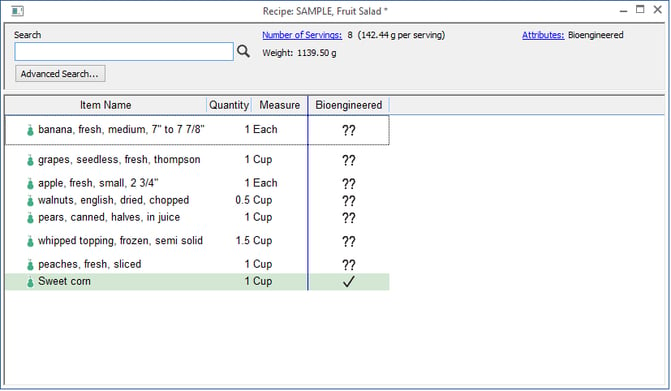
- To see which individual Ingredients contain the BE material, right-click on the screen and select Display Columns. (This opens the corresponding My Preferences page.)
- Select Attributes.
- You will now see which ingredients have associated Attributes as indicated by a checkmark. BE in this case.
- To override the inherited ingredient-level qualification, again select the Attributes button on the Ribbon or go to Edit Recipe and select Attributes.
- In this example, we’re opting to override by choosing the “No” symbol. The program will again ask for substantiating documentation, which we highly recommend in the case of an override.
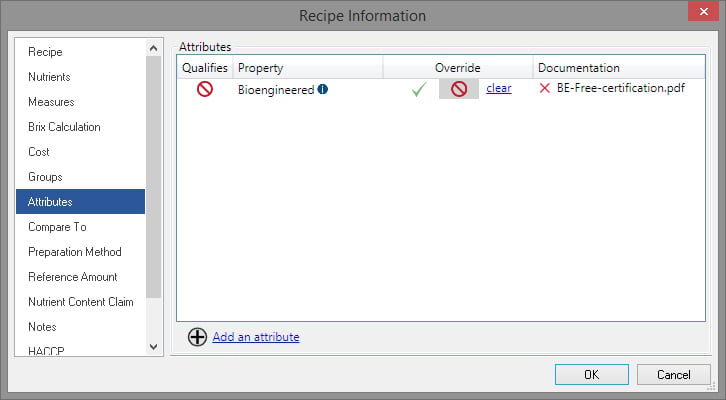
- Clear the override by selecting “Clear.” This causes the software to revert to the BE state based solely on Ingredient information. In our case, the green check will again appear in the Qualifies column, indicating that this is a BE Recipe due to the BE Ingredient..
- You can also add an attribute from this screen, which will be covered later in this blog.
Attributes on the Label
- With this Recipe open, click View Label
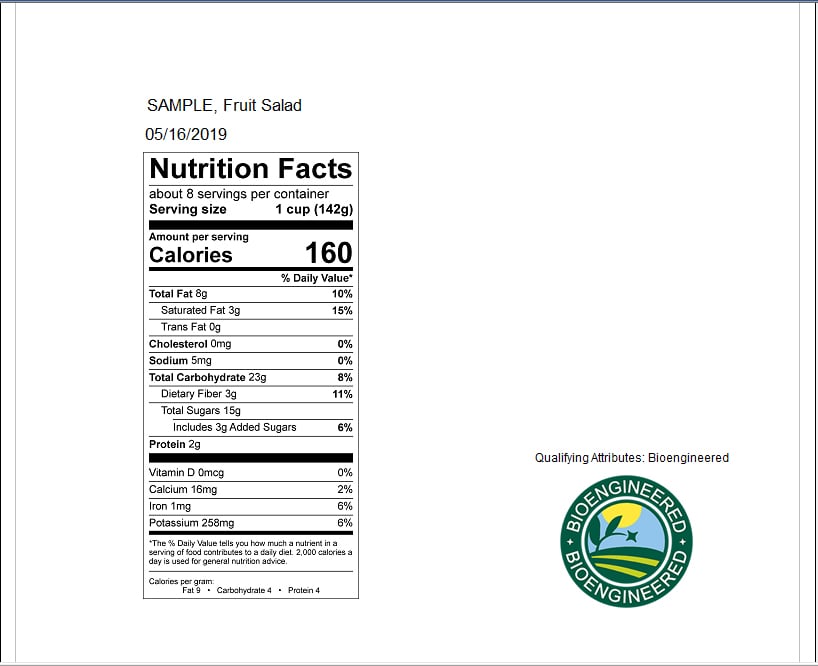
- A list of qualifying attributes and the BE symbol are displayed.
- If they are not displayed, go to Edit Label > Object Properties
- Expand Attributes
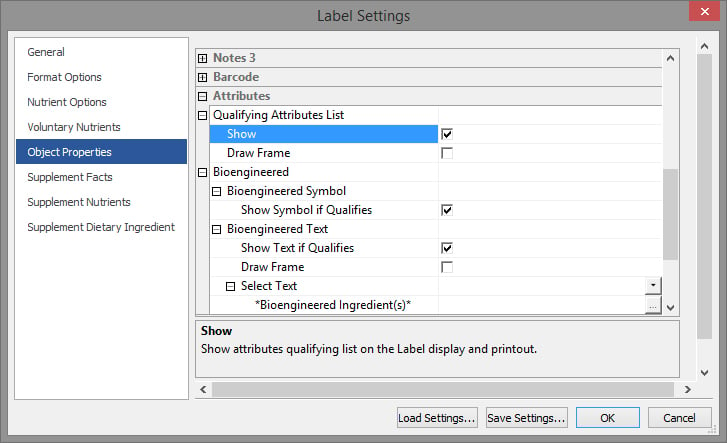
- For Qualifying Attributes List, check Show.
- For Bioengineered Symbol, check Show Symbol if Qualifies.
- You can also show and edit BE text from this dialog.
Adding New Attributes
There are two ways to add an Attribute: Create an entirely new one or migrate one from Groups.
To Create a New Attribute:
- Do one of the following:
• select the Add an Attribute plus sign on a Recipe or Ingredient Attribute dialog OR
• on the Database ribbon, select Modify and click the Attributes tab

- On this screen, enter the name and the qualifying rule. For example, the BE laws say that if any one item contains bioengineered material, that item is considered bioengineered and must be labeled as such. In this case, you would select “At least one item.” Alternatively, to make a “vegan” claim, all of the items must be vegan and in such case you would select “All items.”
To Migrate a Group as an Attribute:
- From the Database ribbon, select Modify and the Groups tab
- Highlight any of the Characteristic Groups or any user-added Group (for this example, we will use Vegan)
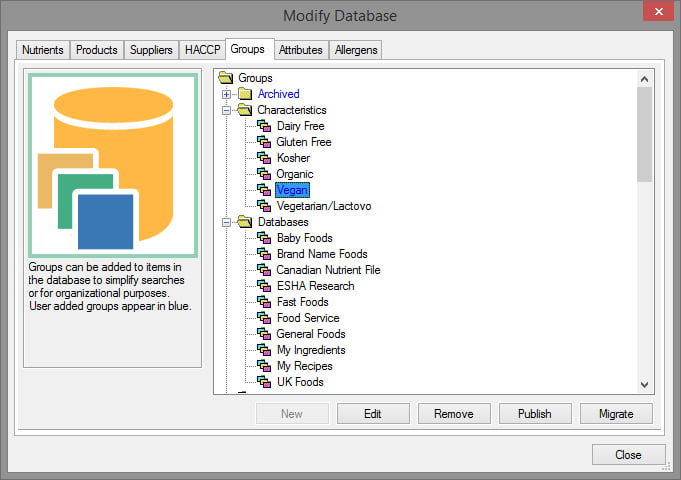
- Select Migrate
- This Characteristic will be moved from Groups to Attributes. Any Recipes or Ingredients associated with the Vegan Characteristic group will now be marked with a Vegan Attribute instead. The Vegan group will be removed from the Characteristics folder under Groups. Warning: You cannot reverse this action.
View this tutorial for in-depth video instructions.
Other posts you might be interested in
View All Posts
Food Labeling
41 min read
| March 10, 2020
Top 23 User-Created Attributes in Genesis R&D Foods
Read More
Trustwell News
5 min read
| July 9, 2020
Increasing Supplier Compliance through FoodLogiQ’s New Attribute Alerts
Read More
Food Safety
7 min read
| May 21, 2019